Writing Unit Test in Java
This guide will help you configure the unit testing framework, JUnit, to write unit tests in Apache NetBeans, IntelliJ IDEA, and from the command line.
Unit Testing in the Apache NetBeans IDE
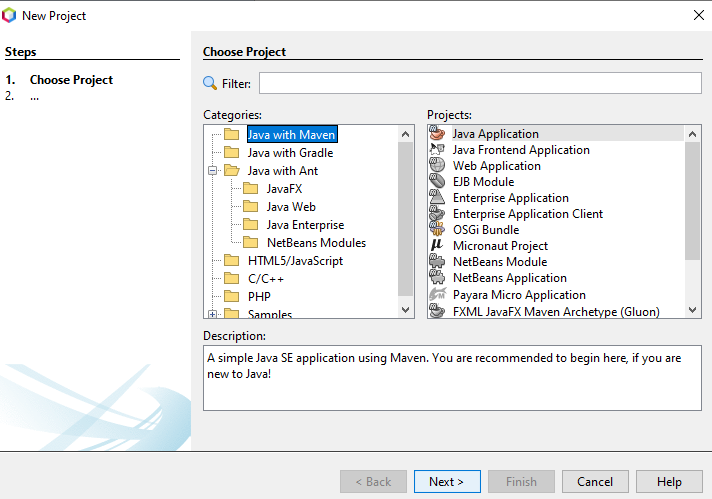
Create a Java application project with Maven
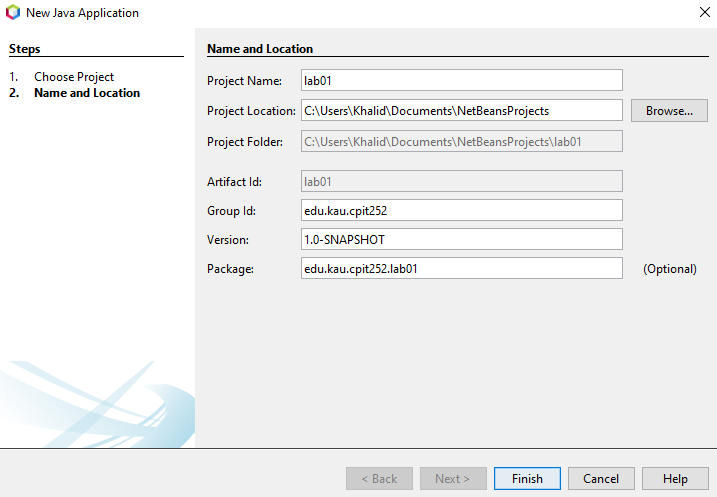
Complete the project details (name, location, group id, version and package) and click Finish
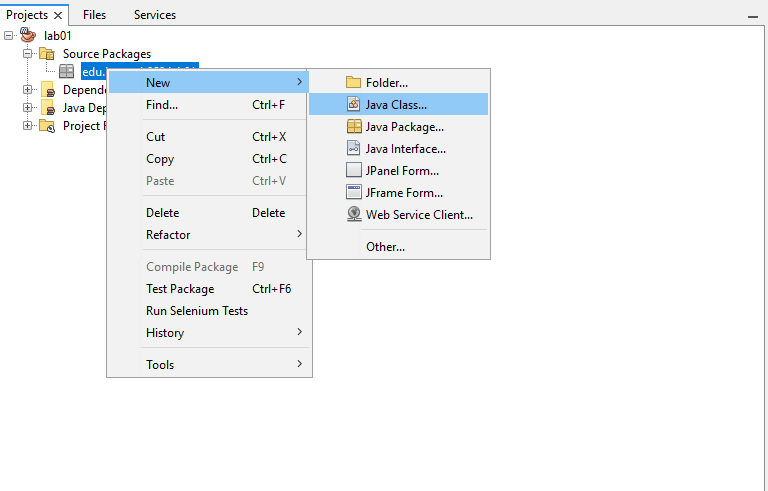
Right Click on the “source packages” and select New -> “Java Class…”
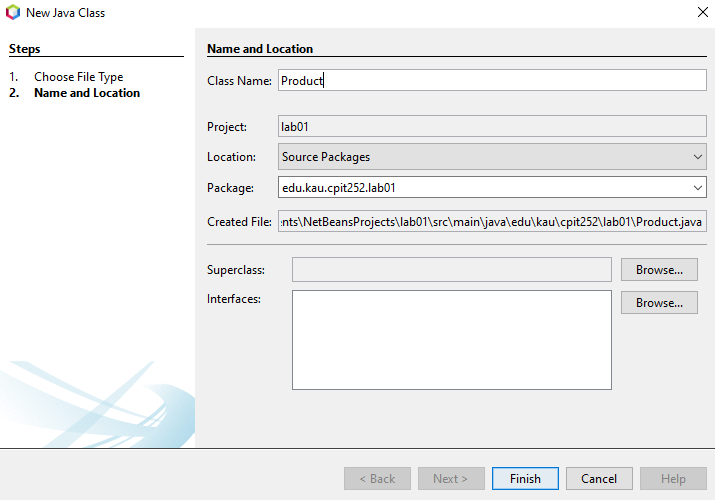
Give the new class a name, select a package and click “Finish”.
Right click on the Java class that you want to write unit test for and select “Tools” -> “Create/Update Tests”
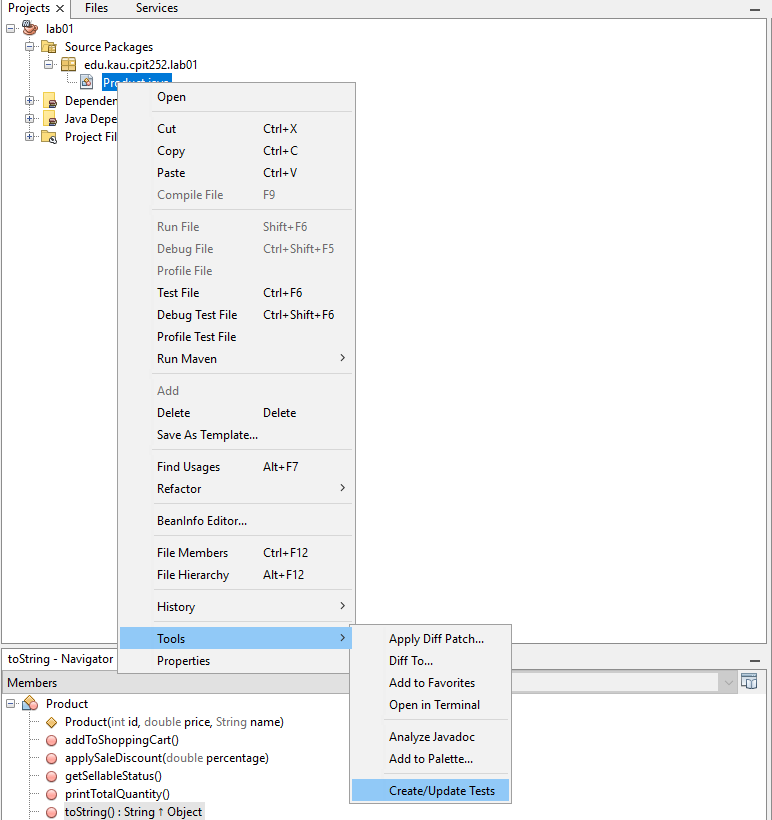
Select “Junit” as the testing framework and depending on your project, you may need to uncheck the auto generated test code stubs.
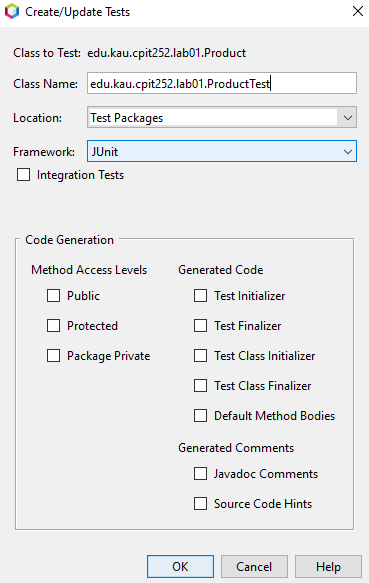
This should result in a new Java test class with the name
ClassNameTest.java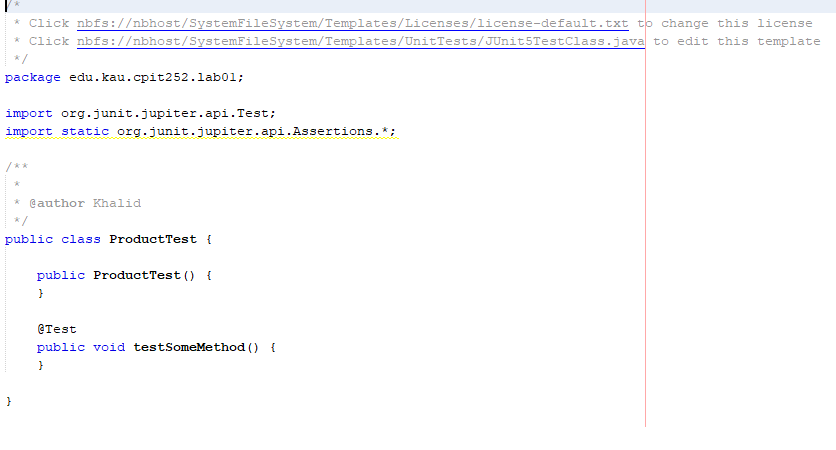
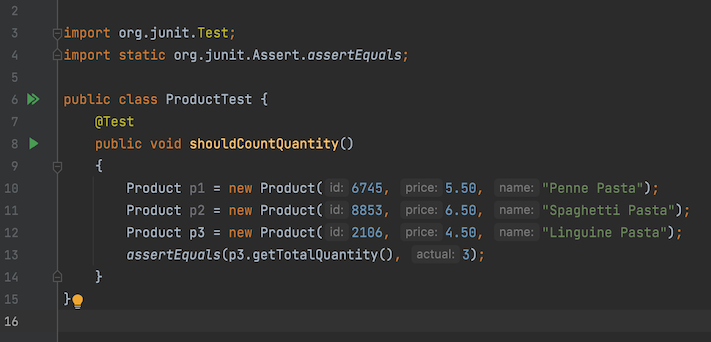
Write the Junit assertions:
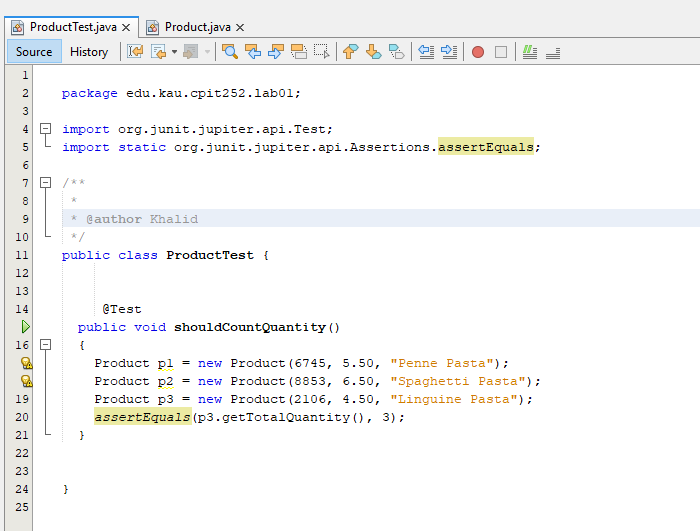
To run your test, select the main menu item “Run” and “Test Project”. This may take a while if it’s the first time to download the required “Jar” files into your local repository.
Note: If you are using an older version of NetBeans (e.g., version 8.2), then right click on the project and select “New” -> “JUnit Test”.
Unit Testing in the IntelliJ IDEA IDE
Create a new Project and select “Maven” from the left side and check “Create from archtype” and select
org.apache.maven.archetypes:maven-archetype-quickstart. Then, click “Next”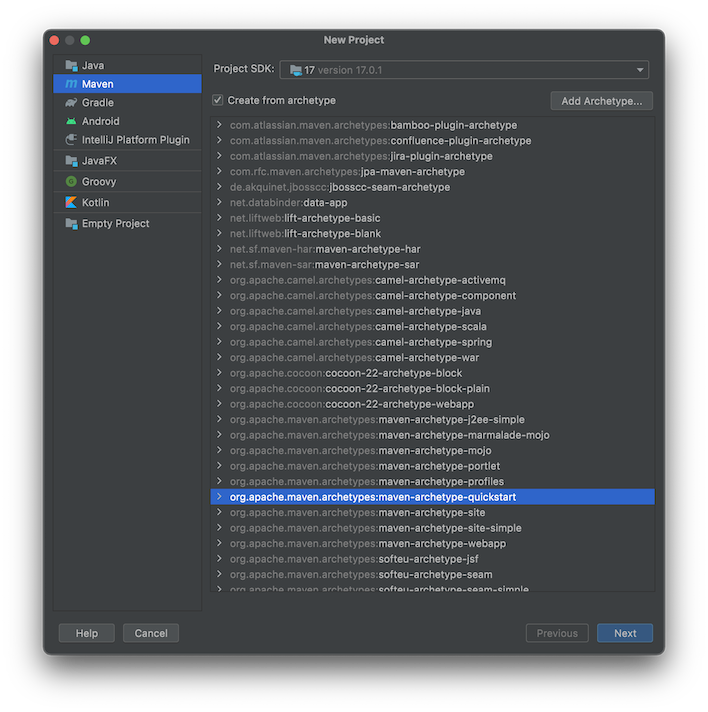
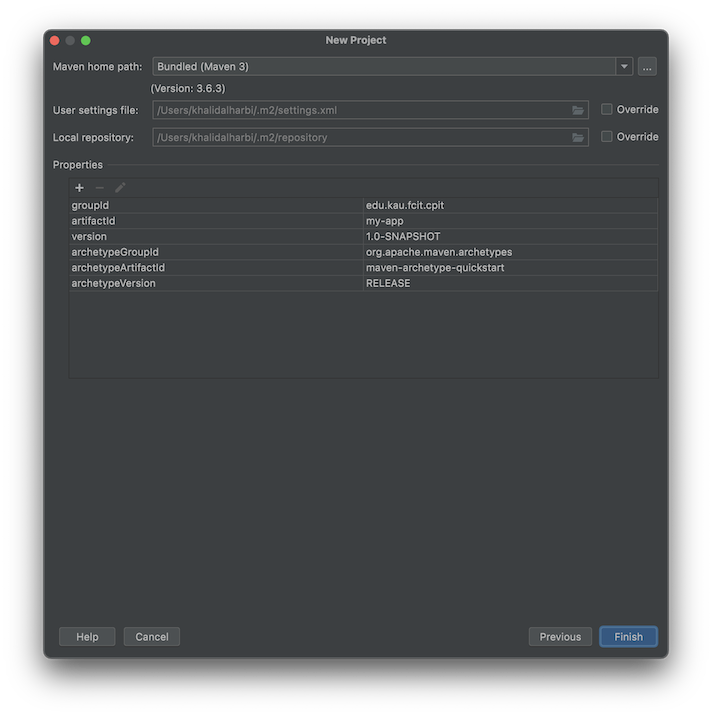
Complete the project details (name, location, groupId, artifactId and version) and click “Next”.

Review the project details and click “Finish”
Place the cursor on the class you want to write unit test for, and press
ALTandENTERon Windows (⌥ ⏎on macOS), and select Create Test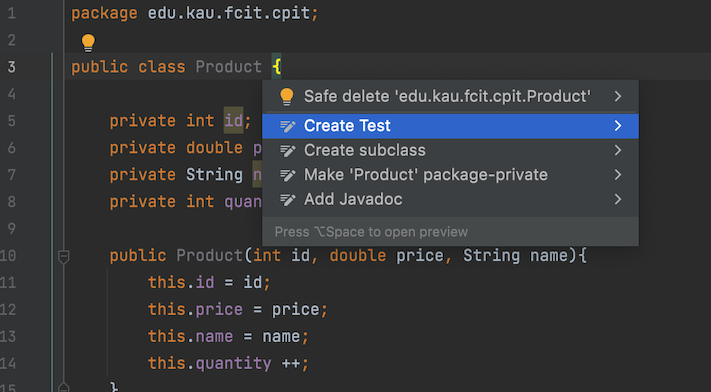
Select the unit testing framework and click “OK”.
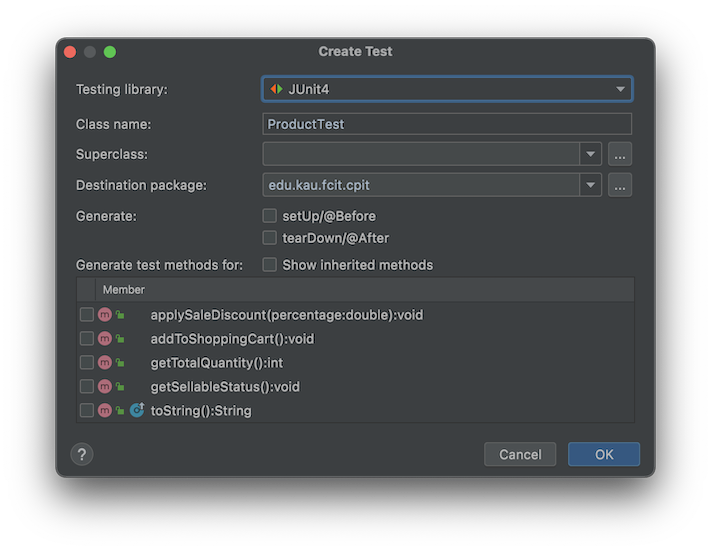
Write the unit test assertions.
To run a particular unit test class, right click on the test file and select “Run”.
Unit Testing from the Command Line
- Download and install Apache Maven.
- Add maven (mvn) the PATH environment variable in your operating system.
- In Windows:
- Open the Start Search, type in “env”, and choose “Edit the system environment variables”
- Click the “Environment Variables…” button.
- Under the “System Variables” section, select “Path” in the first column, and click edit.
- Click “New” and add the path to the “mvn” excutable file.
- In macOS and Linux:
- Add
mvnto the Path variable under~/.bash_profileif you use the Bash shell or~/.zprofileif you use the Zsh shell.
- Add
- In Windows:
- Create a new Java project
mvn archetype:generate -DgroupId=edu.kau.fcit.cpit \ -DartifactId=my-app -DarchetypeArtifactId=maven-archetype-quickstart \ -DarchetypeVersion=1.4 -DinteractiveMode=false - This should result in a project with the following structure:
├── pom.xml └── src ├── main │ └── java │ └── edu │ └── kau │ └── fcit │ └── cpit │ └── App.java └── test └── java └── edu └── kau └── fcit └── cpit └── AppTest.java - The unit test file is located under
src/test/java/edu/kau/fcit/cpit/AppTest.java. To run the test, use:mvn test - To change the Junit version, edit the dependency section in the
pom.xmlfile and re-run the test usingmvn test<dependencies> <dependency> <groupId>junit</groupId> <artifactId>junit</artifactId> <version>4.13.2</version> <scope>test</scope> </dependency> </dependencies>
Environment Variables
Environment variables are variables whose values are set outside of the program. Instead of hardcoded program variables, environment variables are used to store configuration options (e.g., database port number, log path, etc.) and user sensitive data (e.g., database username and password). They provide better security, custom configuration and improve program portability. Environment variables are defined and stored at the system-wide level. Below is how you can set environment variables in the NetBeans IDE, IntelliJ IDEA IDE, and from the command line:
Setting Environment Variables in the NetBeans IDE version 12.X
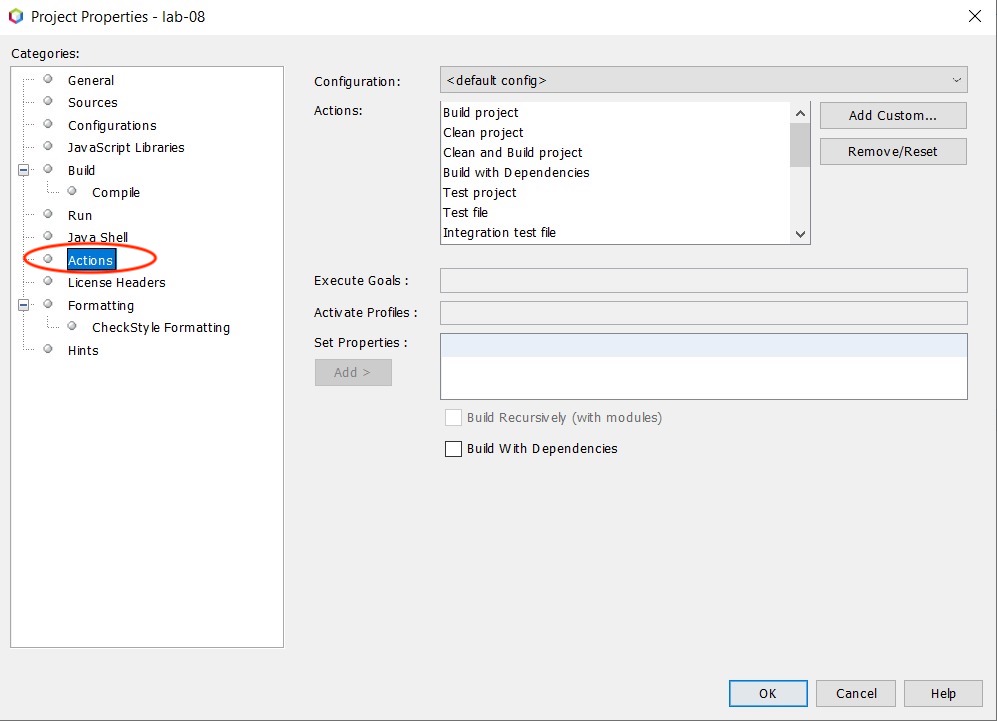
Right click on project, select Properties and then click on Actions.
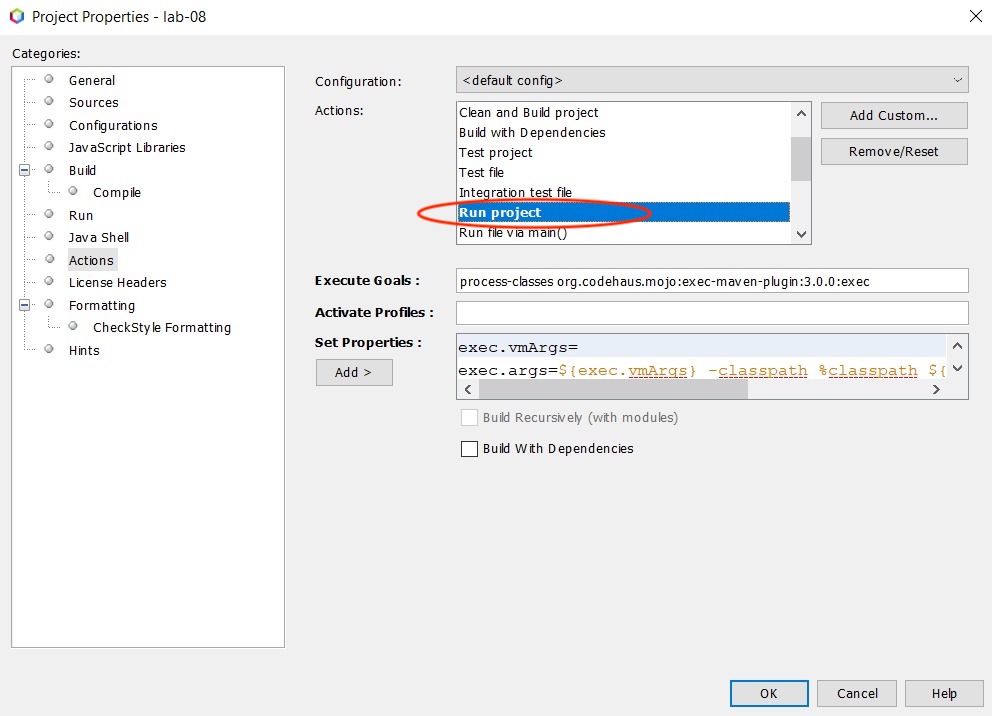
From the list of Actions select Run Project
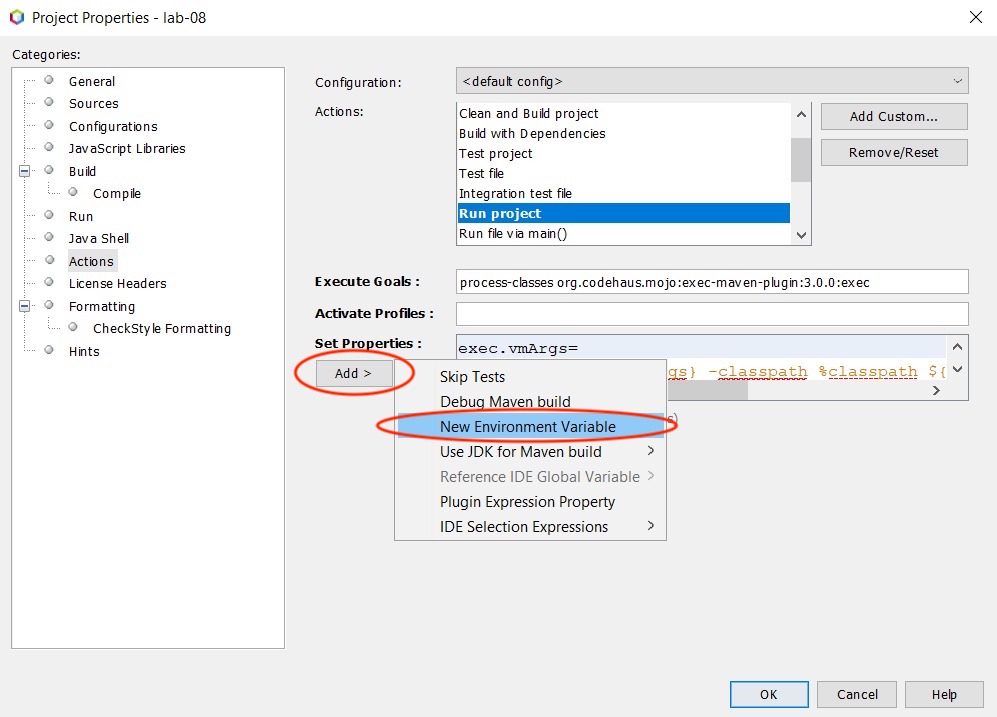
Click on Add button and click on New Environment Variable.
Type in the environment variable
Env.<variable>=<Value>as shown below:
Repeat step 3 to add more environment variables.
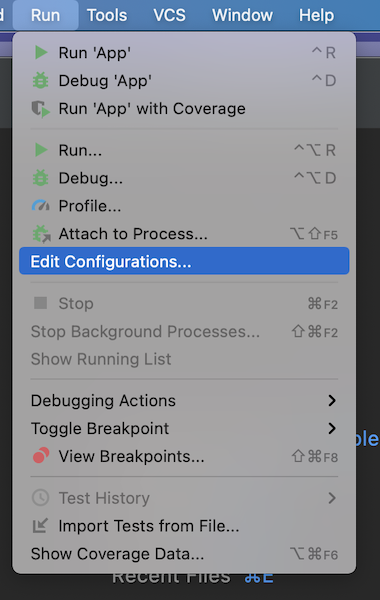
Setting Environment Variables in the IntelliJ IDEA IDE
From the main menu, select Run | Edit Configurations or choose Edit Configurations from the run/debug configurations selector on the toolbar.
Type the variable name and value:
<name>=<value>. If you add several variables, they should be separated with semicolons.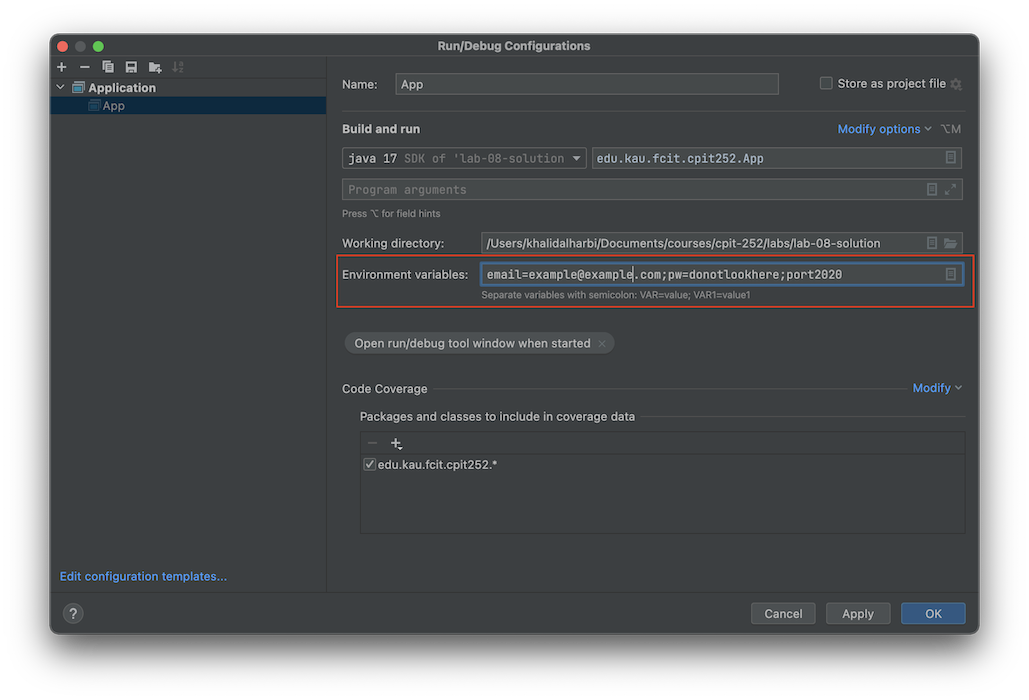
Setting Environment Variables in the Shell/Terminal
export variableName=Value
export username=khalid
Adding Continuous Integration (CI)
Travis CI is a continuous integration service used to build and test projects hosted on open source code repositories such as GitHub and GitLab. To Get started, see Travis CI Tutorial and Building and testing Java with Maven with GitHub Actions